これに、数値入力用ボタンのイベント処理を追加します。 (actionPerformedメソッドの内容を完成させます)
同時に、その数値入力用ボタンに、このactionPerformedメソッドのオブジェクトを、 addActionListenerで設定を追加します。以下にこのコードを示します。
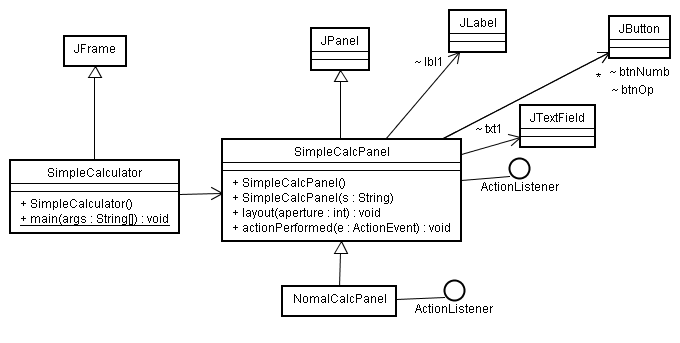
次のクラス図は、前のページ
()で
作成したものです。
これに、数値入力用ボタンのイベント処理を追加します。
(actionPerformedメソッドの内容を完成させます)
同時に、その数値入力用ボタンに、このactionPerformedメソッドのオブジェクトを、
addActionListenerで設定を追加します。以下にこのコードを示します。
package work;

import java.awt.Color;
import java.awt.Font;
import java.awt.event.ActionEvent;
import java.awt.event.ActionListener;

import javax.swing.*;

public class SimpleCalcPanel extends JPanel implements ActionListener{
	JButton []btnNumb = new JButton[11];// 数字用
	JButton []btnOp = new JButton[6];	//オペレーション用ボタン
	JLabel lbl1 = new JLabel("0");
	JTextField txt1 = new JTextField("");

	public SimpleCalcPanel()
	{
		for (int i = 0; i < btnNumb.length - 1; i++)
		{
			this.btnNumb[i] = new JButton("" + i);//数字表示ボタン生成
			this.add(this.btnNumb[i]);
		}
		this.btnNumb[10] = new JButton(".");
		this.add(this.btnNumb[10]);


		btnOp[0] = new JButton("+/-");
		btnOp[1] = new JButton("/");
		btnOp[2] = new JButton("*");
		btnOp[3] = new JButton("-");
		btnOp[4] = new JButton("+");
		btnOp[5] = new JButton("=");
		for (int i = 0; i < btnOp.length; i++)
		{
			this.add(this.btnOp[i]);//オペレーションボタン追加
		}
		this.add(this.lbl1);
		this.lbl1.setBackground(new Color(255, 255, 100));//ラベルの背景色設定
		this.lbl1.setOpaque(true);//ラベルを「不透明な」設定にします。
		this.lbl1.setHorizontalAlignment(SwingConstants.RIGHT);//右よせで文字列を表示
		this.lbl1.setFont(new Font(null, Font.BOLD, 24));

		this.add(this.txt1);
		this.txt1.setHorizontalAlignment(SwingConstants.RIGHT);//右よせで文字列を表示
		this.txt1.setFont(new Font(null, Font.BOLD, 24));

		//数値、点、符号反転のボタンイベントを登録する。
		for (int i = 0; i < this.btnNumb.length; i++)
		{
			this.btnNumb[i].addActionListener(this);
		}
		this.btnOp[0].addActionListener(this);
	}

	public void layout(int aperture){// 隙間の幅を指定して並べる
		this.setLayout(null); //レイアウトなし
		int w = this.getWidth();// 幅取得
		int h = this.getHeight();// 高さ取得
		int height = (h - aperture * 7)/6;//一つの部品の高さ(7箇所の隙間に6つ並べる)
		int y = aperture;
		this.lbl1.setBounds(aperture, y, w-aperture*2, height);

		int btnW = (w - aperture * 5)/4; //一つのボタン幅
		int x;

		y += height + aperture; // 次の行へ
		x = aperture;
		this.btnNumb[7].setBounds(x, y, btnW, height);
		x += btnW + aperture;
		this.btnNumb[8].setBounds(x, y, btnW, height);
		x += btnW + aperture;
		this.btnNumb[9].setBounds(x, y, btnW, height);
		x += btnW + aperture;
		this.btnOp[1].setBounds(x, y, btnW, height);
		int xEnd = x + btnW;//右端ボタンの右端座標

		y += height + aperture; // 次の行へ
		x = aperture;
		this.btnNumb[4].setBounds(x, y, btnW, height);
		x += btnW + aperture;
		this.btnNumb[5].setBounds(x, y, btnW, height);
		x += btnW + aperture;
		this.btnNumb[6].setBounds(x, y, btnW, height);
		x += btnW + aperture;
		this.btnOp[2].setBounds(x, y, btnW, height);

		y += height + aperture; // 次の行へ
		x = aperture;
		this.btnNumb[1].setBounds(x, y, btnW, height);
		x += btnW + aperture;
		this.btnNumb[2].setBounds(x, y, btnW, height);
		x += btnW + aperture;
		this.btnNumb[3].setBounds(x, y, btnW, height);
		x += btnW + aperture;
		this.btnOp[3].setBounds(x, y, btnW, height);

		y += height + aperture; // 次の行へ
		x = aperture;
		this.btnNumb[0].setBounds(x, y, btnW, height);
		x += btnW + aperture;
		this.btnNumb[10].setBounds(x, y, btnW, height);
		x += btnW + aperture;
		this.btnOp[0].setBounds(x, y, btnW, height);
		x += btnW + aperture;
		this.btnOp[4].setBounds(x, y, btnW, height);

		y += height + aperture; // 次の行へ
		x = aperture;
		this.txt1.setBounds(x, y, 160, height);
		x += this.txt1.getWidth() + aperture;
		this.btnOp[5].setBounds(x , y, (xEnd - x), height);
	}

	public void actionPerformed(ActionEvent e){
		if( e.getSource() instanceof JButton == false ) return;
		JButton btn = (JButton) e.getSource();//クリック元のオブジェクトを取得
		String str = btn.getText();
		if(str.compareTo("0") >= 0 && str.compareTo("9") <= 0 || str.equals(".")){
			String selStr = this.txt1.getSelectedText();
			if(selStr != null){
				this.txt1.replaceSelection(str); //選択文字列の置き換え設定
			} else {
				this.txt1.setText( this.txt1.getText() +  str); //文字列後ろに追加
			}
		} else if(str.equals("+/-")){//-を付けるか、消す
			String s = this.txt1.getText().trim();//テキストフィールドを取得
			if(s.startsWith("-")){//先頭文字が - か?
				this.txt1.setText(s.substring(1));//先頭を除いた文字列に設定
			} else {
				this.txt1.setText('-' + s);// -を追加して設定
			}
		}
	}
}
数値入力用の各ボタンをクリックした時に実行するメソッドは、一つのactionPerformedを共通で使っています。
この中で、クリック元のオブジェクトをbtnに参照させ、
そのボタンの表示文字列で、どのボタンがクリックされたを判定し、分岐処理をしています。
ボタン表示文字列が"0"から"9"の範囲か、または"."であれば、
テキストフィールドの選択中文字列を、押されたボタンの文字列で置き換えています。
この選択中文字列の有無は、getSelectedTextで取得して調べ、無い時はテキストフィールドの最後に追加しています。